SequentialExecutor는 airflow를 처음 설치할 때 기본 Executor로 sqlite와 함께 사용할 수 있는 유일한 실행자입니다(sqlite는 다중 연결을 지원하지 않음).
이 Executor로는 한 번에 하나의 작업 인스턴스만 실행하여, 운영환경에는 적합하지 않습니다.
Prerequisites
- Python: 3.8, 3.9, 3.10, 3.11, 3.12
- Databases:
- PostgreSQL: 12, 13, 14, 15, 16
- MySQL: 8.0, Innovation
- SQLite: 3.15.0+
- Kubernetes: 1.26, 1.27, 1.28, 1.29
Airflow Database
airflow 계정을 만드는 예제 입니다.
mysql> create database airflow;

mysql> create user airflow@localhost identified by 'airflow';
mysql> create user airflow@'%' identified by 'airflow';
mysql> grant all privileges on airflow.* to airflow@localhost;
mysql> grant all privileges on airflow.* to airflow@'%';
Airflow 애플리케이션 설치
$ pip install "apache-airflow==2.9.1" apache-airflow-providers-google==10.1.0
Airflow Architecture
- airflow binary: ${HOME}/airflow/bin/airflow or /usr/local/bin/airflow
- configuration: ${HOME}/airflow/airflow.cfg
- sqlite: {HOME}/airflow/airflow.db
- admin 계정 초기 비밀번호: standalone_admin_password.txt
Configuration 수정
sqlite 대신 mysql를 사용했습니다. 그리고 airflow 초기 port는 8080으로 설정되어 있어 충돌이 발생할 경우가 많아, 8888로 변경하였습니다.
- sql_alchemy_conn = mysql://airflow:airflow@127.0.0.1:3306/airflow
- endpoint_url = http://localhost:8888
- base_url = http://localhost:8888
- web_server_port = 8888
- 비고
- load_example = False
Database 초기화 및 admin 계정 생성
MySQL에 airflow db를 생성하고, airflow 계정을 생성합니다.
$ airflow db init
/usr/local/lib/python3.12/site-packages/airflow/cli/commands/db_command.py:48 DeprecationWarning: édb inité is deprecated.  Use édb migrateé instead to migrate the db and/or airflow connections create-default-connections to create the default connections
DB: mysql://airflow:***@127.0.0.1:3306/airflow
.....
Initialization done


$ airflow users create --username admin --password admin --firstname Anonymous --lastname Admin --role Admin --email admin@example.org
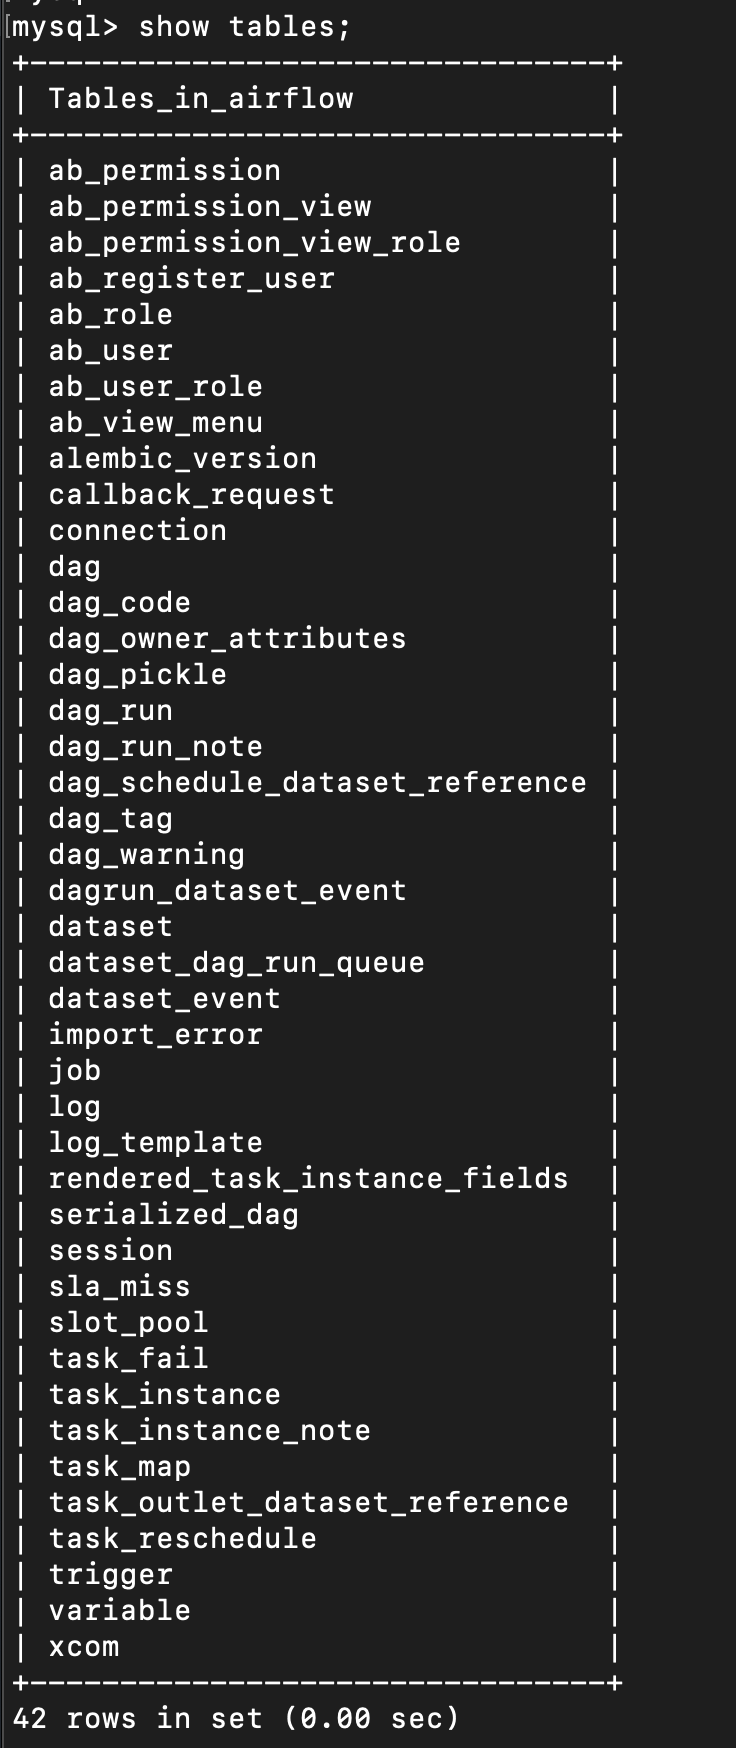
airflow db init으로 생성된 테이블 정보는 다음과 같습니다.

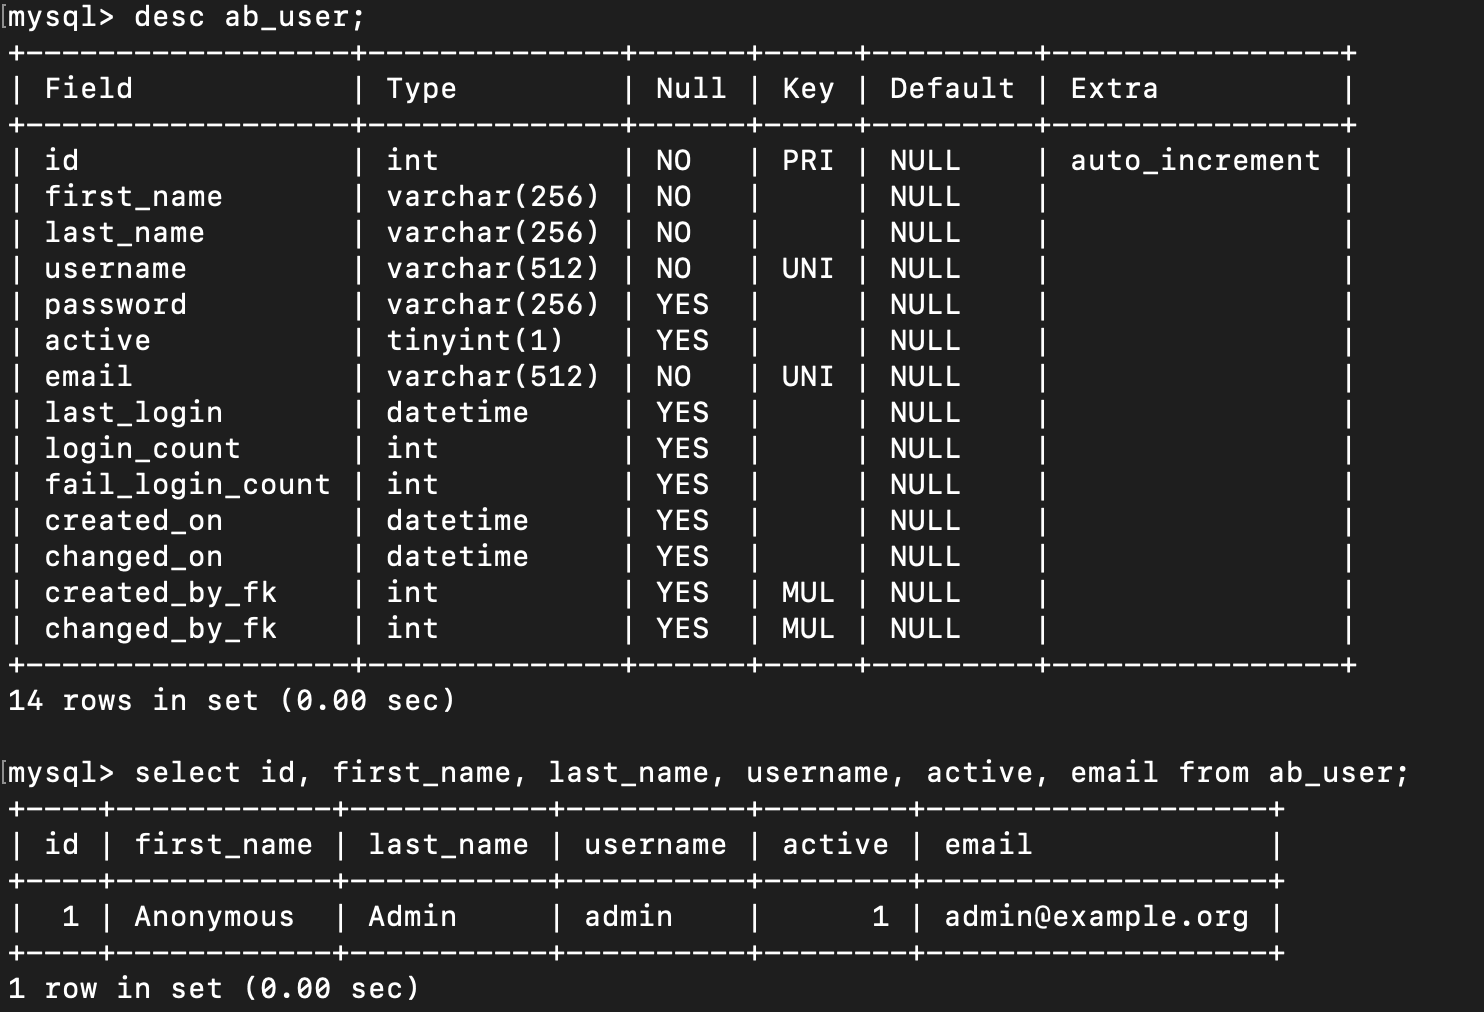
airflow user create 명령으로 생성된 사용자는 다음과 같습니다.

Airflow 어플리케이션 시작
Local 모드에서는 webserver와 schduler만 수행하면 됩니다. Daemon으로 수행하면 커맨드 창에 로그를 볼수 없어, 문제가 있을 경우 로그파일로 확인해야 하므로 처음에는 Daemon 옵션을 제외하고 수행하는게 좋습니다.
$ airflow webserver -D
$ airflow scheduler -D
Airflow Webserver 접속 및 Tutorial 수행
admin/admin 으로 로그인 합니다. Actions 버튼을 클릭해 turotial을 수행합니다.

비고) ModuleNotFoundError: No module named 'MySQLdb' Error
https://sungwoon.tistory.com/71
감사합니다.
참고자료: Installation of Airflow
https://airflow.apache.org/docs/apache-airflow/stable/installation/index.html
'Bigdata > Airflow' 카테고리의 다른 글
| Airflow Plugins (0) | 2024.05.28 |
|---|---|
| Airflow PYTHONPATH (0) | 2024.05.28 |
| Airflow XCcom(Cross-Communication) 정의 및 예시 (0) | 2024.05.23 |
| [Airflow]Operator 정의 및 예제 (1) | 2024.05.23 |
| Airflow Hook 정의 및 예제 (0) | 2024.05.22 |